Kern-sohn MLS 50-3C User Manual
Browse online or download User Manual for Scales Kern-sohn MLS 50-3C. KERN & SOHN MLS 50-3C User Manual
- Page / 83
- Table of contents
- BOOKMARKS
- Operating Manual 1
- Electronic Moisture analyzer 1
- KERN MLS_C 2
- 1 Technical Data 4
- 2 Device overview 6
- WARNING 10
- 7 Menu 17
- 18 MLS_C-BA-e-1330 18
- 29.12.04 Setup 20
- Einstellungen29.12.04 21
- Save ? [Enter/Esc] setup 21
- Saveing 21
- 8 User menu 22
- Setup29.01.08 25
- Setup29.12.04 Setup 26
- 1 point 07:59 30
- 2 pointt 07:59 30
- 3 point 07:59 30
- 31.01.05 33
- ******** 35
- DA /MO /YR 36
- 29.01.08 37
- 27.01.05 38
- 29.12.08 39
- * string = Text 45
- • Standard 48
- • Step-by-step 48
- • Soft 48
- • Fast 48
- % 0.100% 50
- 120 C 120 C 53
- • None 62
- • Optional 62
- • Obligatory 62
- 10 Storing measured results 70
- 5 1 77
- 9 6 77
- 14 Instant help 82
- Declaration of Conformity 83
Summary of Contents
KERN & Sohn GmbH Ziegelei 1 D-72336 Balingen email: [email protected] Phone: +49-[0]7433- 9933-0 Fax: +49-[0]7433-9933-149 Internet: www.kern-
10 MLS_C-BA-e-1330 4 Basic Safety Precautions 4.1 Pay attention to the instructions in the Operation Manual Carefully read this operation
MLS_C-BA-e-1330 11 CAUTION The moisture analyzer operates using heat! + Maintain sufficient space in the environment of the instrument to prevent
12 MLS_C-BA-e-1330 5 Transportation & Storage 5.1 Testing upon acceptance When receiving the appliance, please check packaging immedia
MLS_C-BA-e-1330 13 Secure all items against slipping or damage.
14 MLS_C-BA-e-1330 6 Unpacking, Setup and Commissioning 6.1 Installation Site, Location of Use The instrument is designed to achieve relia
MLS_C-BA-e-1330 15 6.2 Unpacking and assembly Take the moisture meter carefully out of its packaging, remove the plastic jacket and install it at
16 MLS_C-BA-e-1330 6.3 Scope of delivery Serial accessories: • Moisture analyzer, see illustration chap. 2 • 10 sample dishes • Power
MLS_C-BA-e-1330 17 6.7 Operating the scales using PS keyboard Using a PS keyboard will help you to enter numbers and texts faster and easier.
18 MLS_C-BA-e-1330 P3 Date/time P3 01 date format M/T/J; T/M/J P3 02 clock time format 12 h; 24 h P3 03 time P3 04 date P3
MLS_C-BA-e-1330 19 7.1 Navigation in the menu: Operation/display: Description: The overview for the Operator Menu appears Either P7 02 program l
2 MLS_C-BA-e-1330 GB KERN MLS_C Version 3.0 11/2013 Operating Manual Electronic Moisture analyzer Table of Contents 1 TECHNICAL DATA
20 MLS_C-BA-e-1330 Confirm the setting by pressing the -key; the submenu appears on the display How to change functions and paramete
MLS_C-BA-e-1330 21 Any changes made will be saved when returning to weighing mode by using the following saving procedure: Actuate Esc key again,
22 MLS_C-BA-e-1330 8 User menu Press the F-key; the main menu appears: 1. Menu number (P1 - P9) 2. Menu designation 3. Cursor (►) ind
MLS_C-BA-e-1330 23 8.1 P1 Calibration (adjustment) As the acceleration value due to gravity is not the same at every location on earth, each balanc
24 MLS_C-BA-e-1330 Place the adjustment weight in the centre of the sample dish, then press the PRINT key. If the adjustment was successful,
MLS_C-BA-e-1330 25 Ensure that there are no objects on the weighing plate. Press the PRINT key. In the display there appears the value of the adjust
26 MLS_C-BA-e-1330 03 Calibration test This is used to determine the deviation from the last adjustment. This is only a check, i.e. no valu
MLS_C-BA-e-1330 27 06 Temperature calibration We recommend occasionally checking the temperature level of the device using the temperature calibrat
28 MLS_C-BA-e-1330 Begin temperature calibration: Close heating hood and carry out temperature calibration as described in the followi
MLS_C-BA-e-1330 29 Printout example KERN YKB-01N: Return to weighing mode: Press the ESC-key repeatedly until the query ”SAVE?“ appears. Confir
MLS_C-BA-e-1330 3 8 USER MENU ... 22 8.1 P1 Cal
30 MLS_C-BA-e-1330 04 Temperature adjustment The temperature is measured at three points and can be adjusted at these temperature points. Be
MLS_C-BA-e-1330 31 Temperature calibration of third point will take 8 min after which you will hear an acoustic signal Enter the temperatur value a
32 MLS_C-BA-e-1330 05 Report printout This menu point is used to enable the function for printing your adjustment data. Press the arrow key
MLS_C-BA-e-1330 33 8.2 P2 GLP (Good laboratory practice) Quality assurance systems require printouts of weighing results as well as of correct adju
34 MLS_C-BA-e-1330 All settings that are supposed to be printed must be activated with "1 / yes" Example 1: Adjustment
MLS_C-BA-e-1330 35 8.2.1 P3 Date/time Under this menu item you can set output and format of time and date. Operation Display Call up menu item &q
36 MLS_C-BA-e-1330 03 Time Press the arrow keys ( ), to select “03 Time“. Press button Press the arrow keys ( ), to select the desire
MLS_C-BA-e-1330 37 05/06 Overlay of time/date on display Press the arrow keys ( ), to select “05/06 display. Select time/date“ . Press the key;
38 MLS_C-BA-e-1330 02 Auto zero Press the arrow keys ( ), to select “02 Auto zero“. Press the -key; the current menu item blinks Press th
MLS_C-BA-e-1330 39 8.2.3 P5 RS-232 In this menu item you can save your settings for the interface. Operation Display Call up menu item "P5
4 MLS_C-BA-e-1330 1 Technical Data ata MLS 50-3C Radiator Infrared (1 x 400 W) Temperature range max. 160°C Maximum load (Max) 50 g Rea
40 MLS_C-BA-e-1330 8.2.4 P6 output In this menu item you can select between 5 different types of data output: Operation Display Call up me
MLS_C-BA-e-1330 41 Example in drying mode: ------------------- Start drying------------------- Program nb : 1 Name : Floar 100 Profil
42 MLS_C-BA-e-1330 Text input: • Max. 640 characters • 80 lines • 8 characters per line After each line confirm your text input using
MLS_C-BA-e-1330 43 Print related variables \\ Printout of 1 character “/” (i.e. in order to print out 1 character /, two // must be entered) c CRLF
44 MLS_C-BA-e-1330 Example of text input in weighing mode: Example 1: Max mass can not exceed 11.250 g! Parameter No. Text 1 2 3 4 5 6 7
MLS_C-BA-e-1330 45 Example for text input in drying mode Parameter selection: Header – 2. printout (menu item P6 01header no.) Measured value
46 MLS_C-BA-e-1330 8.2.5 P7 General functions Operation Display Call up menu item "P7 Others" (see chapt. 7.1) Press button P
MLS_C-BA-e-1330 47 9 Operator menu – moisture analysis The device has space for up to 100 different, operator-defined drying processes. Simply in
48 MLS_C-BA-e-1330 9.1.2 Setting drying parameters You can enter parameters for each drying process in the menu, as follows: • Heating pro
MLS_C-BA-e-1330 49 To return to menu, press the PRINT-key. This is where you can store further drying parameters. or Return to weighing mode: Press
MLS_C-BA-e-1330 5 Shut-down criteria • Automatic 1 (shut-down at change of weighing value < 1mg within 10 s) • Automatic 2 (shut-down at chan
50 MLS_C-BA-e-1330 Define Settings are available for selection from 0 to 10 mg in 0.1 mg steps and from 5 seconds to 175 in 5 second ste
MLS_C-BA-e-1330 51 To return to menu, press the PRINT-key. This is where you can store further drying parameters. or Return to weighing mode: Press
52 MLS_C-BA-e-1330 Tab. 1 % M: Moisture content Display shows the moisture content of the sample as a percentage of the wet weight (W = we
MLS_C-BA-e-1330 53 4. Output interval This is used to set at which interval interim results are to be printed. Press the -key; the menu item “Pri
54 MLS_C-BA-e-1330 1. Date 2. Time 3. drying parameters: Heating profile / shutoff criteria / unit of measured result / output interval
MLS_C-BA-e-1330 55 Place sample in sample dish Close lid; the device is ready for measuring Drying will start automatically after scales have s
56 MLS_C-BA-e-1330 To switch the display to the various units of the measured result, press the M-key. When drying is finished, you will h
MLS_C-BA-e-1330 57 9.2 Moisture analysis using the program library The device has a memory for drying processes! 99 drying processes can be allocat
58 MLS_C-BA-e-1330 9.2.2 Setting drying parameters Operation Display Press Menu-key; library opens Information: The most recent program u
MLS_C-BA-e-1330 59 Press the arrow keys ( ), to select “Profile“ Press -button Press the -key anew; the current menu item blinks Press the arro
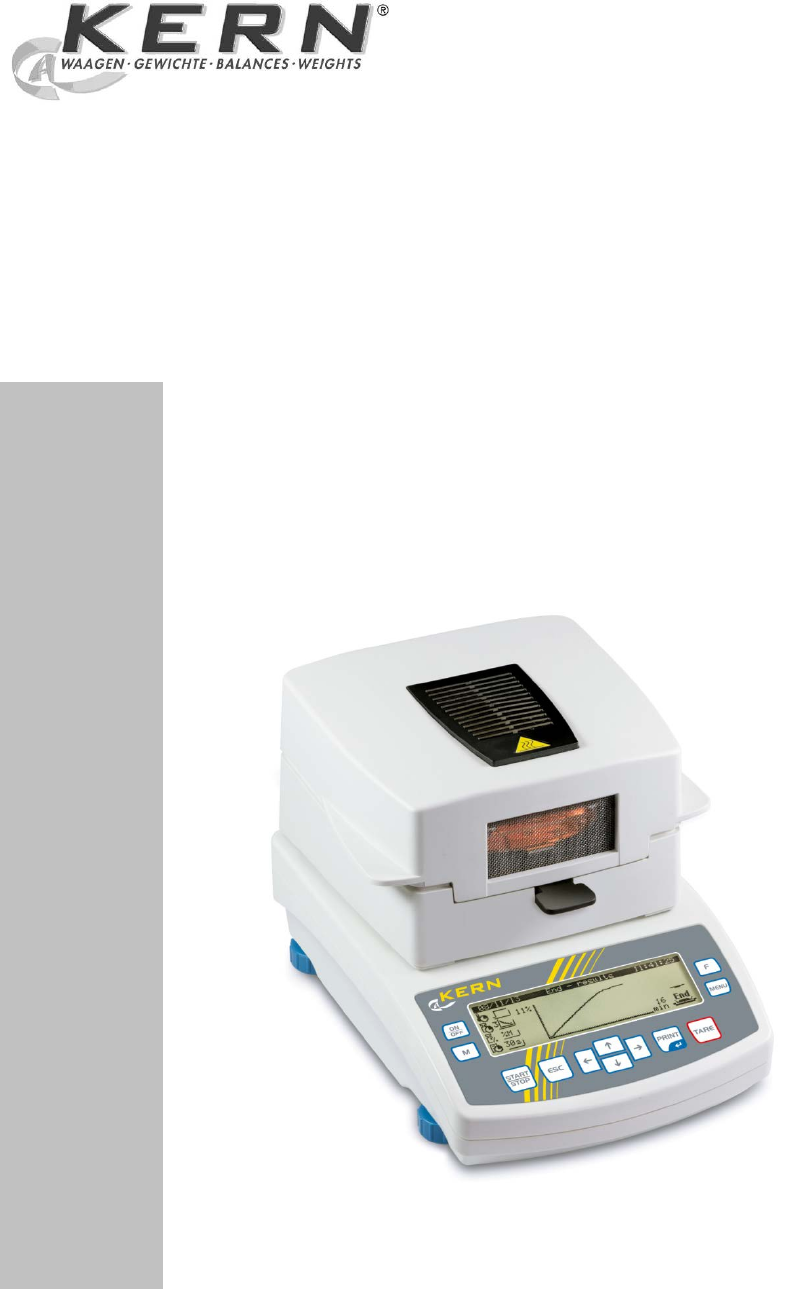
6 MLS_C-BA-e-1330 2 Device overview Pos. Description 1 Heated cover 2 Viewing panel 3 Halogen lamp 4 Sample dish 5 Windshield 6 Removal a
60 MLS_C-BA-e-1330 3. Drying temperature This is used to enter the drying temperature a second time. This setting overwrites the drying tim
MLS_C-BA-e-1330 61 Press the arrow keys ( ), to select “Shutoff“ Press the -key for the current setting to appear Press the -key; the current m
62 MLS_C-BA-e-1330 7. How to enter a target weight for a sample The user can enter a target weight stating a tolerance range for the sample
MLS_C-BA-e-1330 63 8. Determine and enter corrective factor Certain materials emit more heat than is introduced from the outside. Dark substance
64 MLS_C-BA-e-1330 How to enter the determined corrective factor: Press the arrow keys ( ), to select “Corrective Factor“ Press the -bu
MLS_C-BA-e-1330 65 10. Printing drying parameters If the device is connected to an optional printer the drying parameters settings can be printed ou
66 MLS_C-BA-e-1330 9.2.3 How to save drying parameters After all drying parameters have been set, press the ESC-key The query “Save Prog
MLS_C-BA-e-1330 67 Press START/STOP-key Place removal aid with empty sample dish on the sample dish retainer. Make sure that the sample dish is r
68 MLS_C-BA-e-1330 Place sample in sample dish Close lid; the device is ready for measuring Drying will start automatically after s
MLS_C-BA-e-1330 69 To switch the display to the various units of the measured result, press the M-key. When drying is finished, you will hear an a
MLS_C-BA-e-1330 7 2.1 Keyboard overview Button Function • Switch machine on/off • Switch display during drying process • Start/finish mea
70 MLS_C-BA-e-1330 10 Storing measured results The device is able to store the most recently carried out measurements (max. 100 measurement
MLS_C-BA-e-1330 71 11 General information concerning moisture analysis 11.1 Application In all cases where moisture is added to or removed from p
72 MLS_C-BA-e-1330 the same time, they should be packed in airtight boxes so that they do not undergo changes during storage. To receive re
MLS_C-BA-e-1330 73 11.5 Sample material Easy to determine are usually samples with the following characteristics: - Grainy to powdery, pourable so
74 MLS_C-BA-e-1330 11.7 Drying temperature Bear in mind the following factors when setting the drying temperature: Surface of the sample:
MLS_C-BA-e-1330 75 11.8 Description of heating profiles 4 heating profiles are available, as follows: • Standard • Fast • Soft • Step-by-st
76 MLS_C-BA-e-1330 11.9 Recommendations / Guidelines Prepare standard sample: - Crush sample, as required, and spread it evenly in the al
MLS_C-BA-e-1330 77 12 Data output Pin allocation of the balance output plug (front view): 5 1
78 MLS_C-BA-e-1330 12.1 Remote control instructions Commands Function R CR LF Reset to manufacturer setting - reset PC CR LF Command to
MLS_C-BA-e-1330 79 13 Service, maintenance, disposal Before any maintenance, cleaning and repair work disconnect the appliance from the operating
8 MLS_C-BA-e-1330 2.2 Display overview (during measurement) 1. Display in moisture % 2. Current moisture content in %. 3. Output int
80 MLS_C-BA-e-1330 Clean temperature sensor Clean the same way, as described above. Ensure the emitter is not t
MLS_C-BA-e-1330 81 13.2 Change fuse + Disconnect equipment from power supply. + Swap fuse as shown in illustration. 13.3 Servicing, main
82 MLS_C-BA-e-1330 14 Instant help Fault Possible cause Display is not lit up. • The display unit is not switched on • The mains sup
MLS_C-BA-e-1330 83 15 Declaration of Conformity KERN & Sohn GmbH D-72322 Balingen-Frommern Postfach 4052 E-Mail: [email protected] Tel: 0049-[
MLS_C-BA-e-1330 9 3 Basic Information (General) 3.1 Proper use The device purchased by you is designed for a fast and reliable determination of ma
Related products and manuals for Scales Kern-sohn MLS 50-3C
 (96 pages)
(72 pages)
(119 pages)
(85 pages)
(189 pages)
(78 pages)
(94 pages)
(16 pages)
(12 pages)
(36 pages)
(15 pages)
(32 pages)
(42 pages)
(39 pages)
(53 pages)
(7 pages)
(21 pages)
(41 pages)
(96 pages)
(72 pages)
(119 pages)
(85 pages)
(189 pages)
(78 pages)
(94 pages)
(16 pages)
(12 pages)
(36 pages)
(15 pages)
(32 pages)
(42 pages)
(39 pages)
(53 pages)
(7 pages)
(21 pages)
(41 pages)
 (39 pages)
© 2020, manymanuals.com. All rights reserved. | 0.405 s |
 Manymanuals.com
 Manymanuals.de
 Manymanuals.fr
 Manymanuals.it
 Manymanuals.pl
 Manymanuals.cz
 Manymanuals.es
 Manymanuals-pt.com
Comments to this Manuals